This tutorial will cover how to Install the ELK stack, but before let’s justify the usage of ubuntu 18.04.
The Ubuntu 18.04 release is the latest long-term support (LTS) of Ubuntu, the world’s most popular desktop Linux distro. Ubuntu 18.04 LTS comes with 5 years of support and updates from Canonical, from 2018 through to 2023.
What is the ELK Stack?
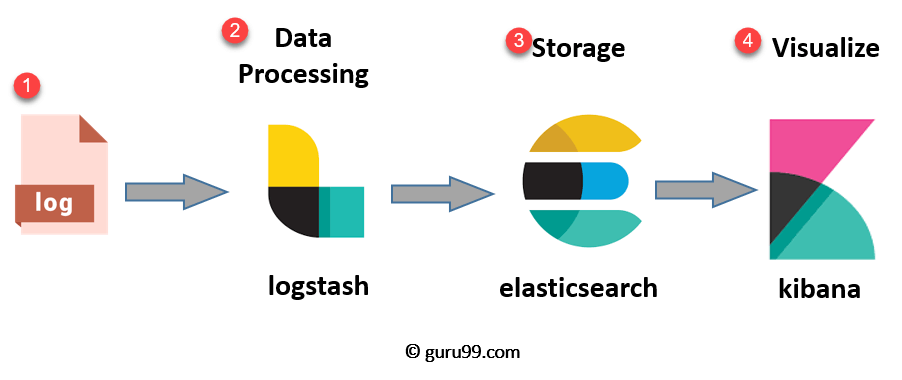
The ELK Stack is a collection of three open-source products — Elasticsearch, Logstash, and Kibana. They are all developed, managed ,and maintained by the company Elastic.
E stands for ElasticSearch: used for storing logs
L stands for LogStash : used for both shipping as well as processing and storing logs
K stands for Kibana: is a visutalization tool (a web interface) which is hosted through Nginx or Apache
1- Install The Dependencies
Before installing the ELK stack, Some packages and frameworks are needed like nginx and openJDK
sudo apt install openjdk-8-jre apt-transport-https wget nginx2- Add The Elastic Repository
Elastic has repositories available for APT and YUM-based distributions. It provides binary packages, but no source packages.
Import the GPG key , add the repository:
wget -qO - https://artifacts.elastic.co/GPG-KEY-elasticsearch | sudo apt-key add -create the elastic.list file
sudo nano /etc/apt/sources.list.d/elastic.listAdd the following to the file (ctrl + x to exit then y to save)
deb https://artifacts.elastic.co/packages/6.x/apt stable mainSave that file, and exit. Update Apt.
sudo apt update3- Install Elasticsearch and Kibana
Install Elasticsearch and Kibana through apt
sudo apt install elasticsearch kibanaEdit the Kibana configuration to specify the host server (localhost)
nano /etc/kibana/kibana.yml
#Uncomment the line (or add)
server.host: "localhost"
Restart Kibana and start the Elasticsearch
sudo systemctl restart kibana
sudo systemctl start elasticsearch
4 – Set up Nginx
Kibana is served through Nginx, so Nginx needs to be configured.
Start by setting password to kibana. (Remember the password, you will use it in the last steps)
#change the word password to yours:
"admin:`openssl passwd -apr1 password`" | sudo tee -a /etc/nginx/htpasswd.kibana
Create Nginx Configuration file
sudo nano /etc/nginx/sites-available/kibanaAdd the following.. (Set your host server instead of ubuntu and you can use your IP instead of localhost)
server {
        listen 80;

        server_name ubuntu;

        auth_basic "Restricted Access";
        auth_basic_user_file /etc/nginx/htpasswd.kibana;

        location / {
            proxy_pass http://localhost:5601;
            proxy_http_version 1.1;
            proxy_set_header Upgrade $http_upgrade;
            proxy_set_header Connection 'upgrade';
            proxy_set_header Host $host;
            proxy_cache_bypass $http_upgrade;
        }
    }
Save it. Delete the default configuration file then create a new symlink in sites-enabled for Kibana.
sudo rm /etc/nginx/sites-enabled/default
sudo ln -s /etc/nginx/sites-available/kibana /etc/nginx/sites-enabled/kibana
Restart the Nginx :
sudo systemctl restart nginx5- Install Logstash
Install the logstash
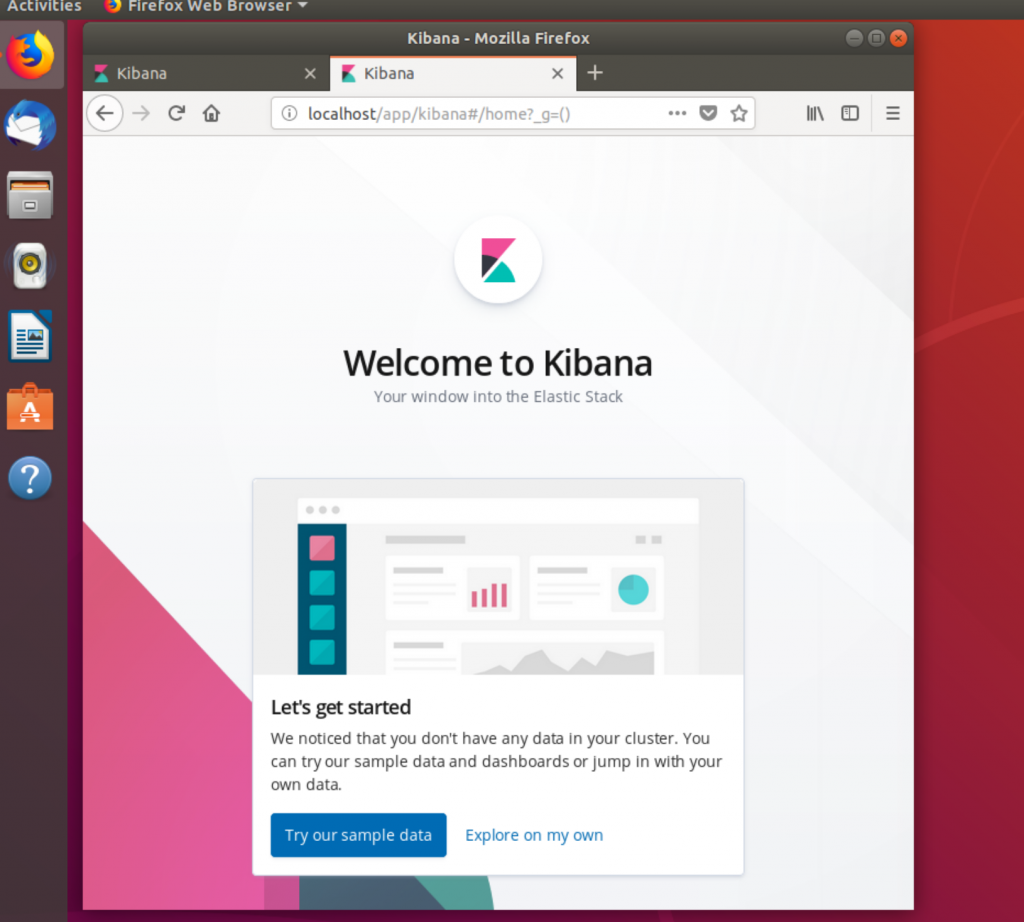
sudo apt install logstashTest Kibana
Open a browser and go to localhost/app/kibana … you will be prompted to enter the username and password that you set up for Kibana.. ET VOILAAAAA:
More on the website
This tutorial covered how to Install the ELK slack , you can find more on the website: